Black Friday is upon us again so I was inclined to check out deals on new gadgets. As with any Black Friday season, you begin to justify why you need to buy something just because it’s on sale. This year, I had my eye on a new iPad considering how reasonably priced they are nowadays (around 300 bucks for an entry level one). There we’re Black Friday deals where it was around 100 bucks off for both the 32gb and 128gb models. This would mean I can get the 128gb 2019 iPad for ~330 bucks, which would be the usual price of the 32gb version. What a super cut!
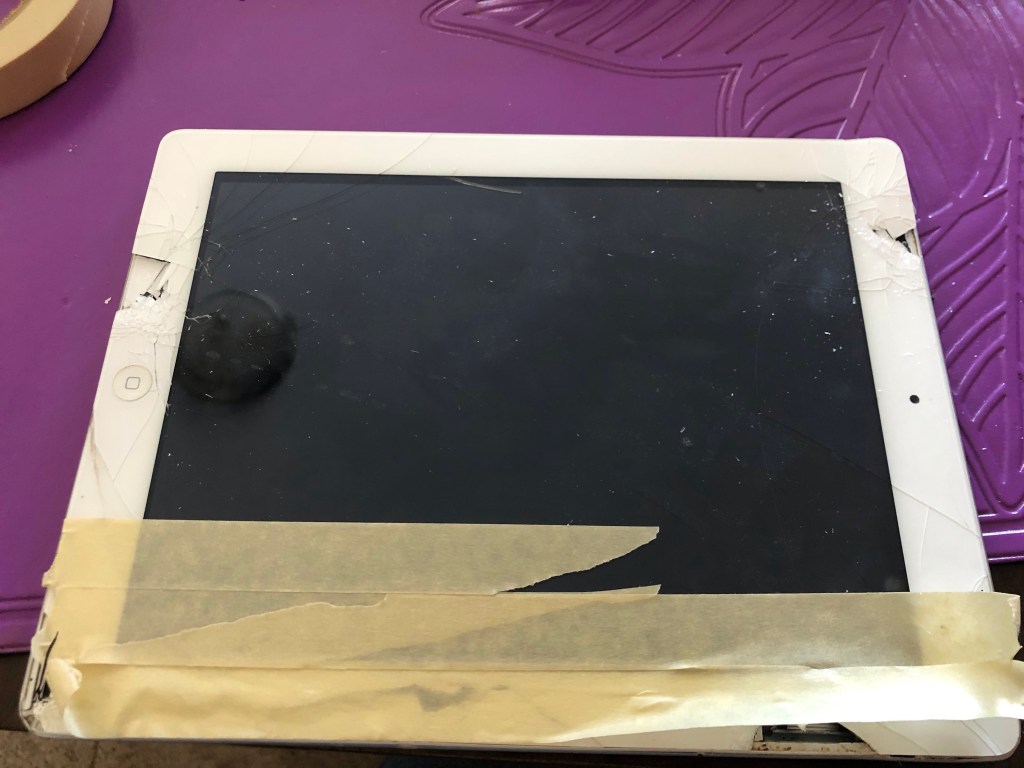
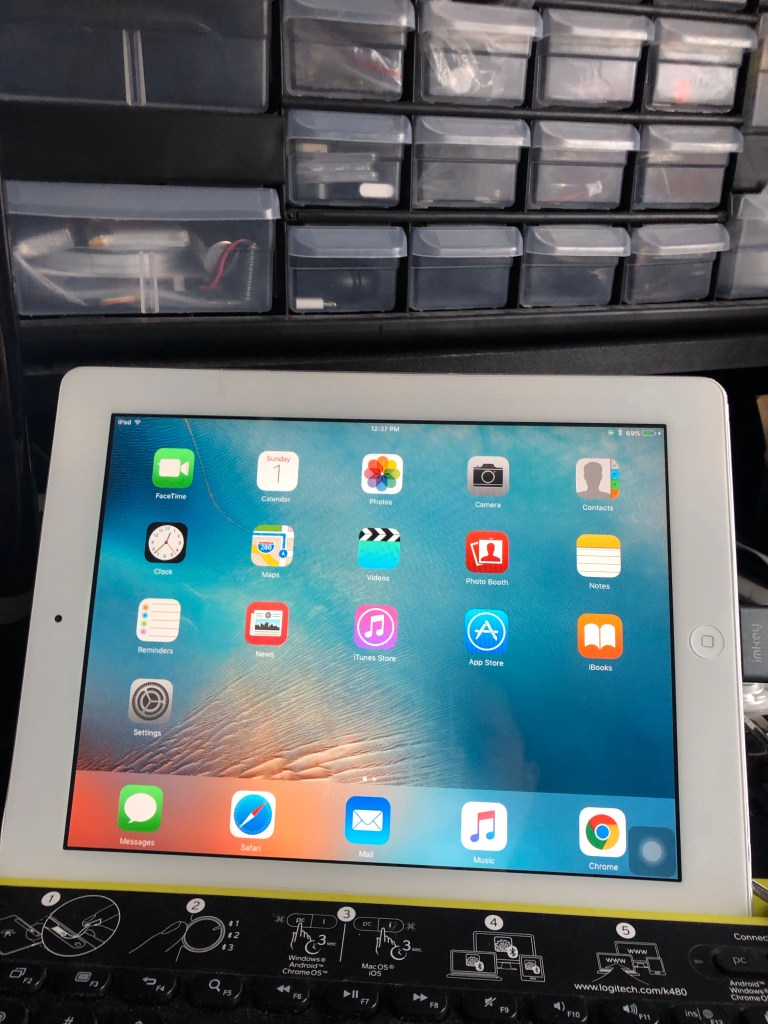
But because I was anti-consumerism (aka very cheap), I decided to work on a project to prevent myself from falling into this very sophisticated marketing trap. This was something that I’ve shelved for a very long time because I could not find a good reason to do it. I had a very old iPad 2. The one that was practically indestructible. We’ve had it for almost a decade and my son grew up using it as his first computer (yes, I just called the iPad a computer). It has been dropped, tossed, covered with food of all sorts and occasionally washed with various liquids unintentionally. He used it up till a couple years ago when I finally gave him my old iPhone 6. Before that, he had been using the iPad primarily for watching YouTube as it had reached a point where most apps either did not install on it or even if they did they we’re too slow to be usable. It also had a broken screen that was starting to become a safety hazard as I didn’t even bother taping it up 😁.
The parts required to fix an iPad 2 screen are not that expensive and are readily available almost anywhere. I’ve had it on my Amazon shopping cart for years but just could not find a reason to work on it. I’ve also done my research as to the difficulty of the build and know that it is not simple. Boy was I wrong. It was hell on earth 😂. So, to quell my desire to spend 300 bucks on a new iPad that I did not need, I decided to fix up the old one. I ordered the parts from Amazon in the morning and was told that it would arrive later in the evening. That just confirms my personal theory that Amazon tracks the items I keep on my shopping cart and pre-ships them to a closer location if I am likely to purchase them. That is the level of personal privacy we are willing to give up in the world of Web 3.0. Creepiness for convenience.
That is the level of personal privacy we are willing to give up in the world of Web 3.0. Creepiness for convenience.
Mad Computer Scientist
I bought a repair kit that had a new screen digitizer and a spare wifi antenna. Apparently you can easily damage the antenna when removing the old screen digitizer. They sure are right about that (one of the many things that will be damaged in this project!). I also ordered a new 30 pin cable as I could not find a working one in my box of old random cables. Oh how the mighty 30 pin connector has fallen. I also added a replacement home button as I thought I might as well replace that because this project is going to be a cinch considering I’ve been planning it for years. Hindsight truly is 20 x 20.
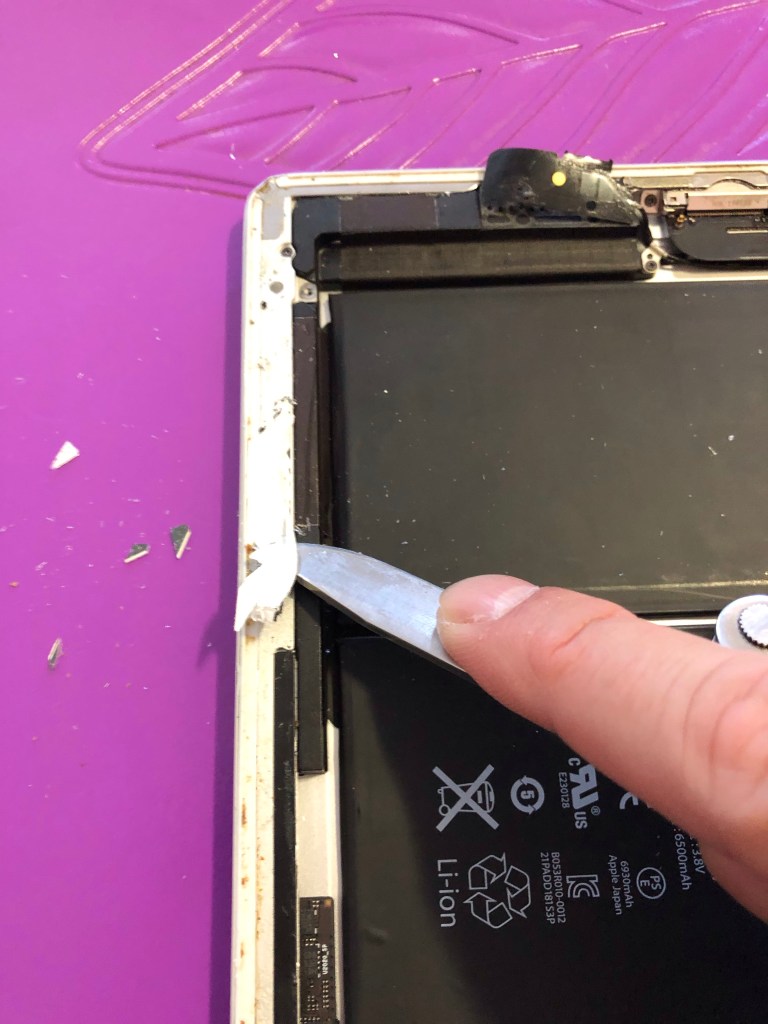
Given I had the rest of the afternoon to wait for the parts I proceeded to prep the sad old iPad for surgery. I began by quickly skimming thru the ifixit instructions casually ignoring the warnings of difficulty level: Difficult, paired with the extremely low repairability score of 2/10. I threw caution to the wind and started prying out the sides of the front panel. I used a plastic spudger tool and put in actual guitar picks as shown in the ifixit tutorial (looked so easy!). Given the considerable abuse this iPad has received and probably due to the old age of the adhesive, I had no issues sliding the pick across one side of the iPad. With my foolish confidence further inflated with this tiny success I proceeded to the other sides. This is where all hell broke loose. Literally.

Broken pieces of glass started flying out of the thing once I pried open the damaged side of the screen. I wisely decided to put on protection (my eye glasses) to prevent them from flying into my eyes (mental note: buy proper eye protection). The adhesive on these parts were very much intact and it required significant force just to rip them off which would cause parts of the screen to crack and fly all over the place. I decided to put some tape on it to minimize this. Something I should have thought of like half an hour ago when I started working on it!

But… You can’t make an omelette without breaking some eggs…
The Joker

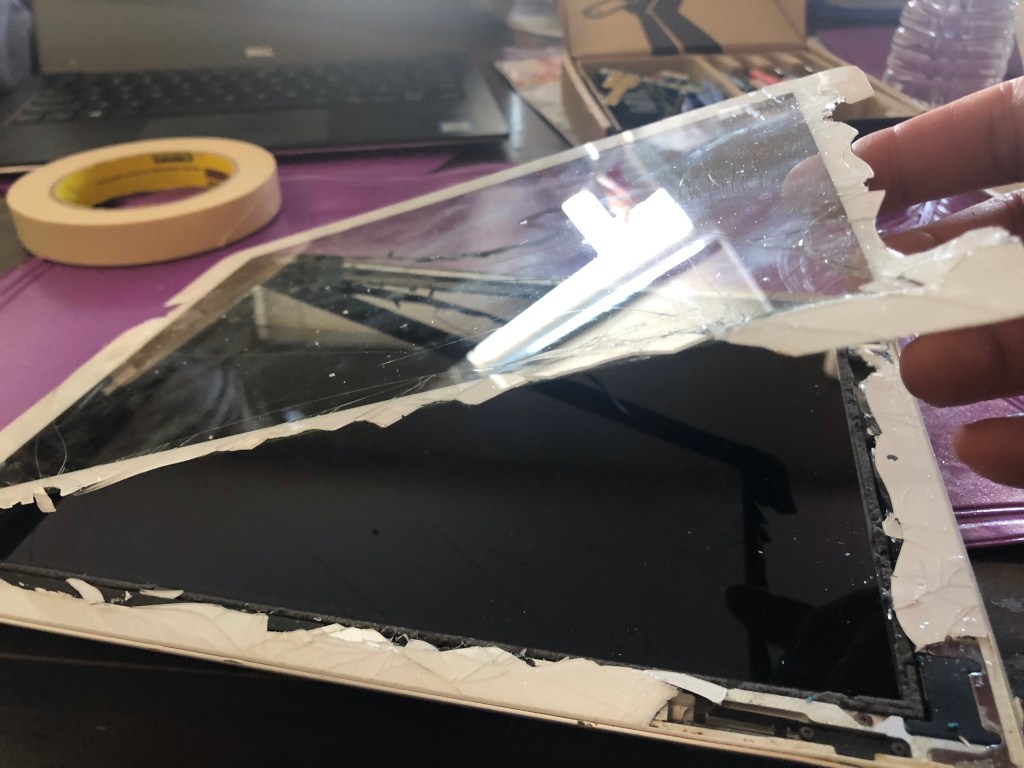

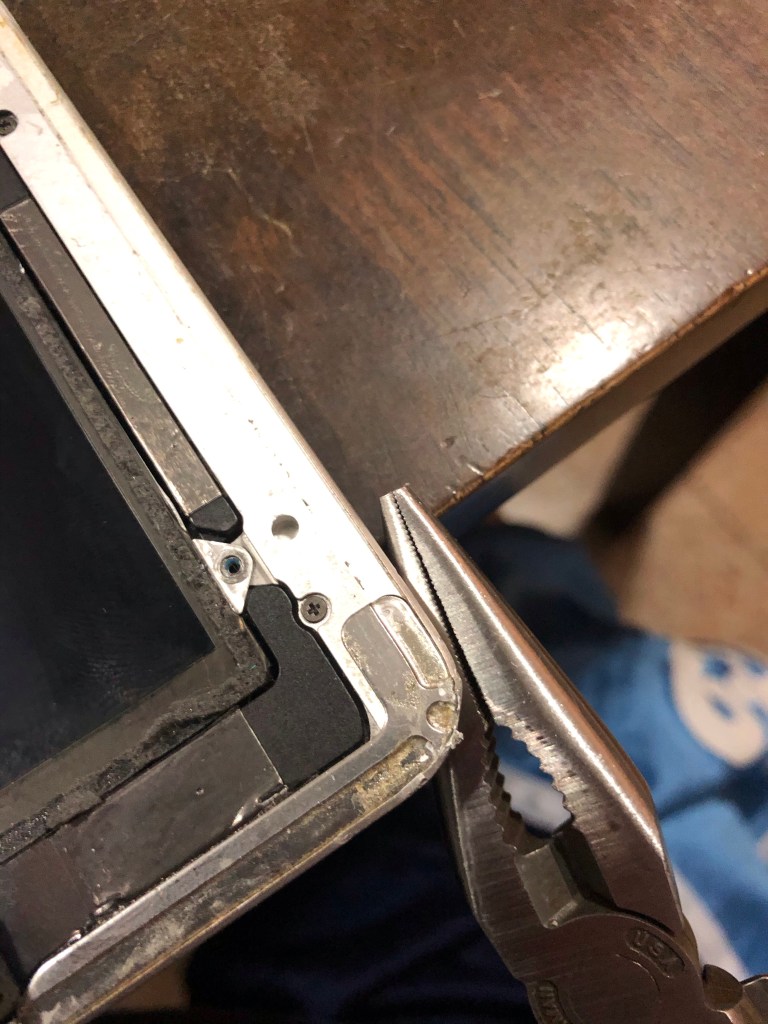
After an hour of working hard to remove the adhesive from all 4 sides I managed to completely destroy the front panel. I elegantly left a bunch of sharp serrated pieces of glass stuck on the sides of the iPad. I thought to myself “It can’t be that difficult to remove”. Not only am I over confident, I am also great at lying to myself.

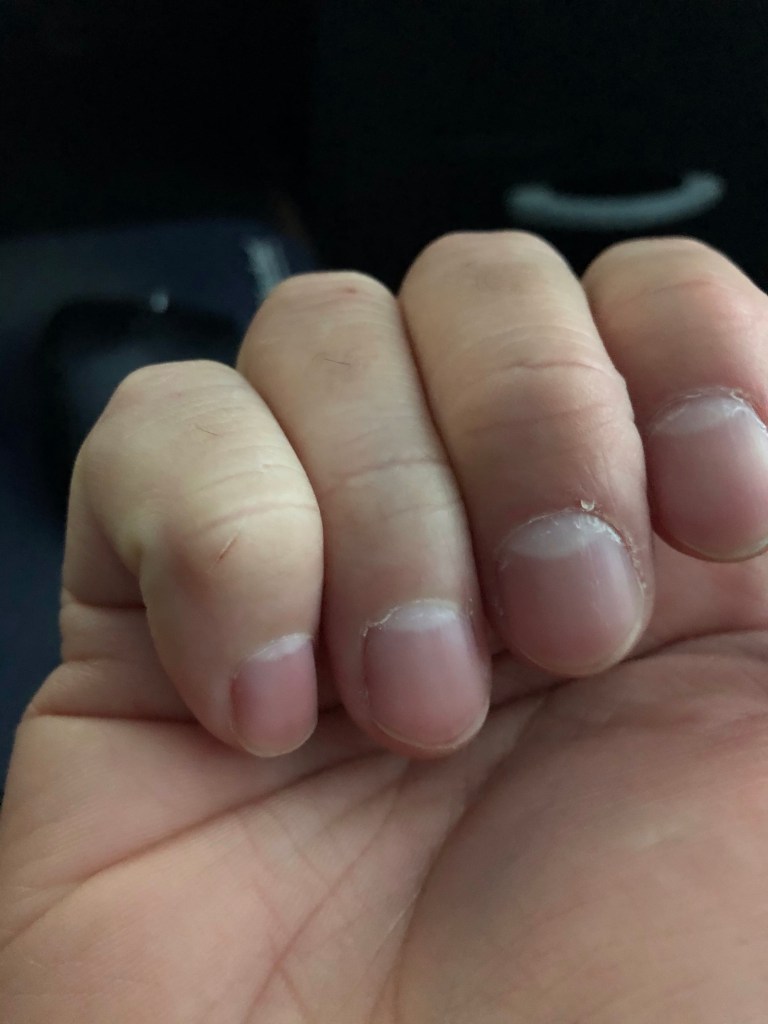
I now proceeded with the pain staking task of removing the shards of glass that are practically welded on the aluminum body. I had to use a knife to scrape the adhesive off and it was not pretty. Tired from almost 2 hours of removing a front panel with shards of small and large pieces of glass everywhere, I get a Black Friday super cut of the medical kind. I decided to post the picture of what it looked like after it healed for the benefit of those who are squeamish 😂. It was pretty bad and my son had to help me stop the bleeding and tape me up.


You know something has gone horribly wrong when you need to use a knife and pliers to fix your iPad
Mad Computer Scientist
Of course during the delicate front panel removal process I had ripped the wi-fi antenna from the body. Luckily I didn’t completely destroy it and it’s still functional. I did have a spare so I decided to look up the steps to replacing the antenna considering how “easy” this build has been anyway. A whopping 48 step tutorial from ifixit just made me realize that maybe Apple was intentionally preventing me from repairing this device. To be fair, I had already completed the first few steps of the 48 steps (destroy front panel). I decided to just tape the antenna back to the housing. A small compromise I’m now willing to accept (one of many to come during the course of this adventure). Big bad Apple has once again won by making another tinkering soul accept the fact that some things are just not worth repairing.
Big bad Apple has once again won by making another tinkering soul accept the fact that some things are just not worth repairing
Mad Computer Scientist
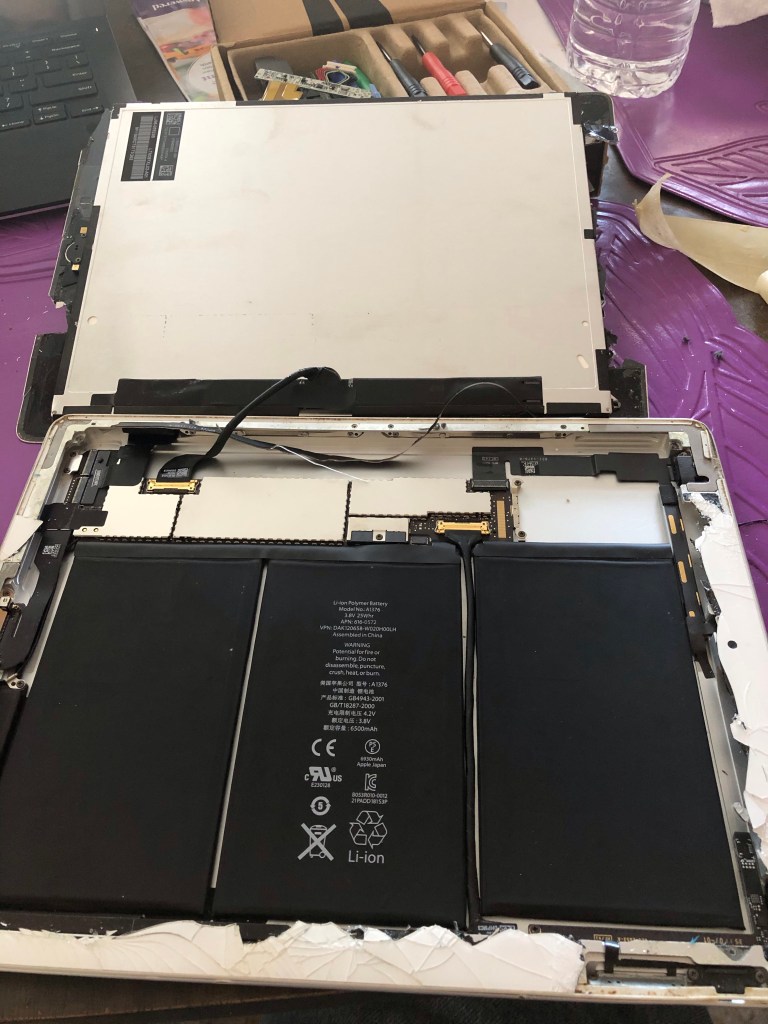
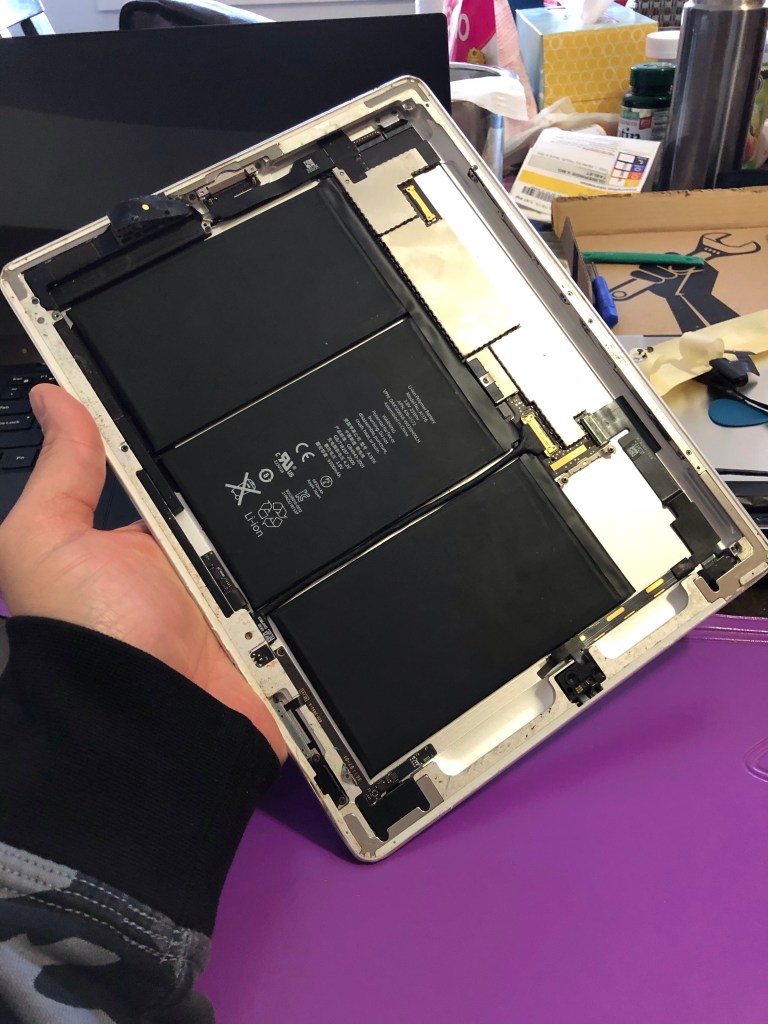
After removing the front panel and cleaning up the debris, I then disassembled the digitizer and LCD screen with no incident. I literally paid for this with my own blood, sweat and tears! 😂
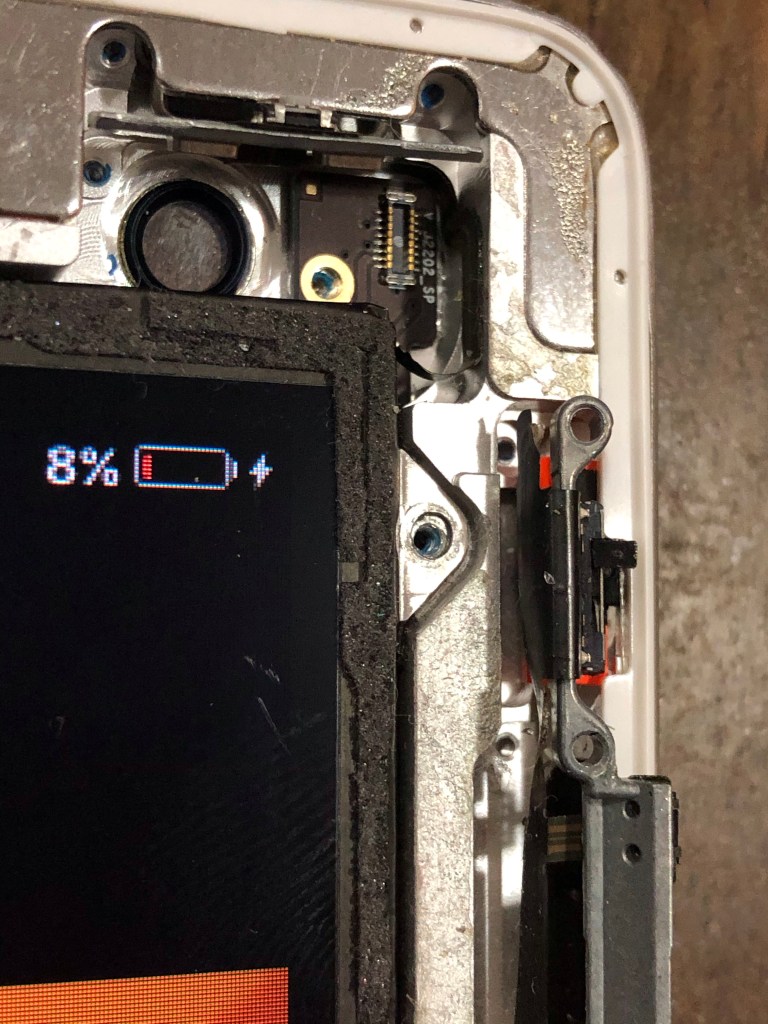
I also remembered that there was an issue with the iPad’s volume rocker. I took apart the lock screen/mute button assembly because the volume rocker is underneath. I was surprised to learn that this was not a complicated 500 step process. I was able to easily adjust the screw tension to make the volume rocker work again. Turns out the chassis might have been deformed by one of the many drops it’s received in its storied existence and has caused the rocker to get stuck. Loosening the metal bar that holds the entire assembly down resolves that.
I’ve removed (destroyed) the front panel, meticulously cleared all the broken shards of glass off the iPad chassis with a knife, manually realigned the aluminum body using pliers to fit the new digitizer and fixed the volume rocker. Things are starting to look up! Until… I decided to clean up all the glass shards and debris off the table with one of these…
I got all those pesky little shards of glass out of my working area. One of which gave me that awesome Black Friday super cut earlier. So in my eager zest to not get another super cut I went on and vacuumed the whole iPad. Yes, that was such a great idea. Except that I tore out the power button cable that was part of the lock switch and volume rocker assembly! These wires were just soooo tiny and delicate. What are these?! Wires for ants?!? Who makes wires like these!?! Apple, that’s who! I checked the teardown steps and the replacement cost. It’s relatively cheap and available but the repair steps require that you dismantle practically half the device to get to the cable. A breezy 57 steps on ifixit. Lovely. I just didn’t have it in me. I decided to just live with it and use the virtual button to replace the power button. A small price to pay so I dont have to go thru another repair adventure with this device.
These wires were just soooo tiny and delicate. What are these?! Wires for ants?!? Who makes wires like these!?! Apple, that’s who!
Mad Computer Scientist inspired by Zoolander
As we all know, all great adventures come to an end. The screen digitizer parts came in later that evening and all I had to do was reassemble the iPad back. I was broken and extremely paranoid though at this point and decided to use clear tape to seal the iPad instead of the adhesive tape that came with the repair kit. I was going to put it in a case anyway. This gives me the option to open it up easily and replace the power button assembly next time I want another afternoon adventure.


One week later…
The brand new screen, old iPad was just not good for anything. Let’s be honest, I never found it to be good for anything before that adventure last week. With the iPad being so old, Apple won’t let you upgrade it beyond iOS 9. Not that it would be able to even if they let you. Right now it really is just useful for watching YouTube. Albeit the slight delays during loading and playing, it was, well, ok. So I did what any other reasonable person on the planet would do after spending hours trying to repair a broken down old iPad. I bought a new one 🤣.

After spending hours of fighting broken glass and frustrating hardware designs intended to prevent you from repairing your own device, I rewarded Apple by buying a new iPad.
Defeated Mad Computer Scientist
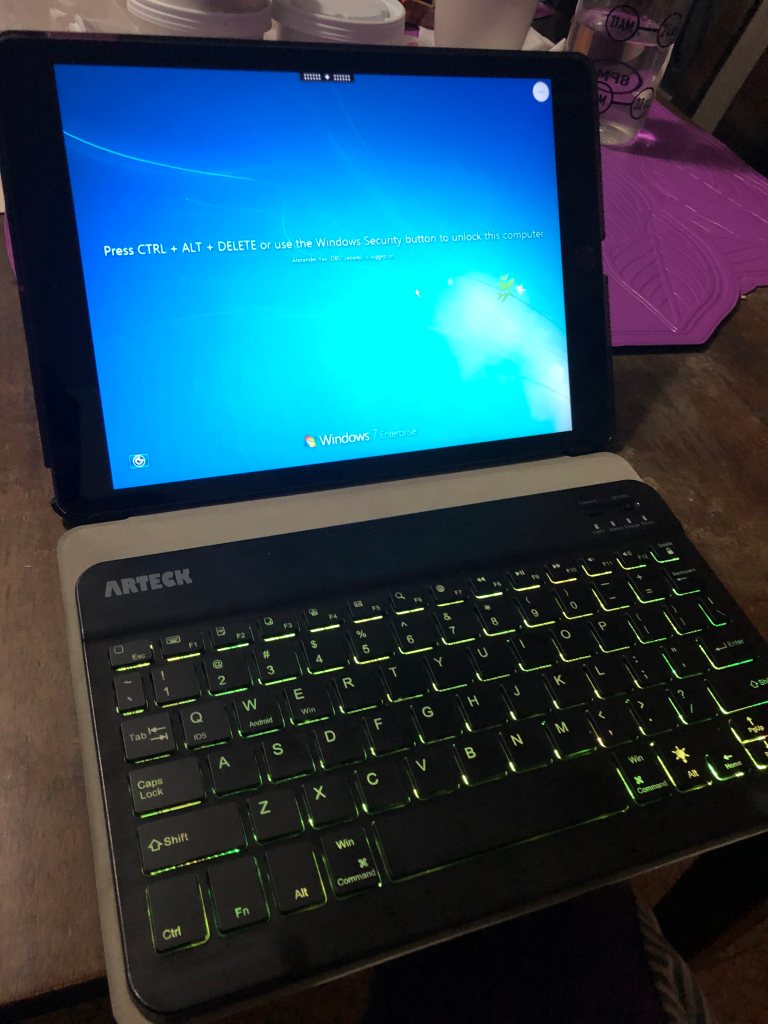
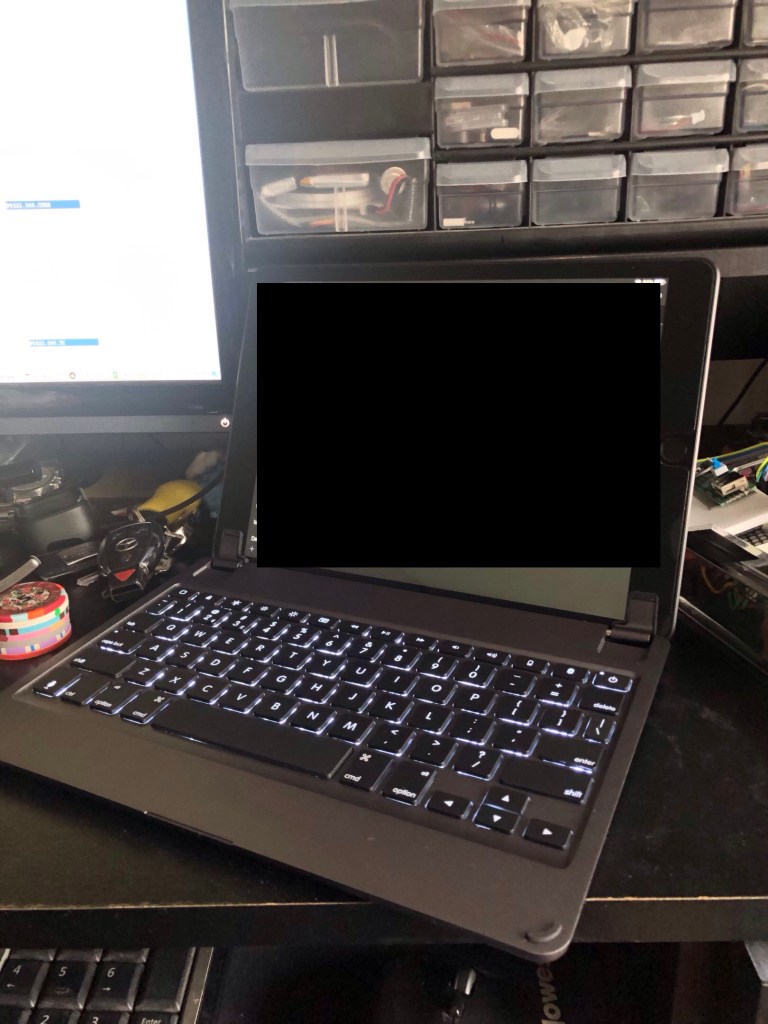
To be honest I have no business owning an iPad. There was only 1 app that I wanted to use on a bigger screen, Videoleap. I use it for editing music videos. I’ve been using it on my iPhone with no issues for months and having it on the iPad does improve the experience but does not fully justify the cost of owning it. The iPad feels like an incomplete device without a keyboard. Luckily I have the keyboard just for it from a previous project. I took apart the mount and turned it into a kick stand and placed the keyboard on the smart cover. It had magnets so it would align well enough for use. Unfortunately it was flimsy and did not close well. So now I was carrying around an iPad and a keyboard instead of an iPad with a keyboard. Worst of all it was not lappable. I had decided to use this primarily as a blogging device given I could not find any other good use for it. But it being non lappable on a bus ride just makes it annoying.


The iPad feels like an incomplete device without a keyboard
Mad Computer Scientist
Another week later…
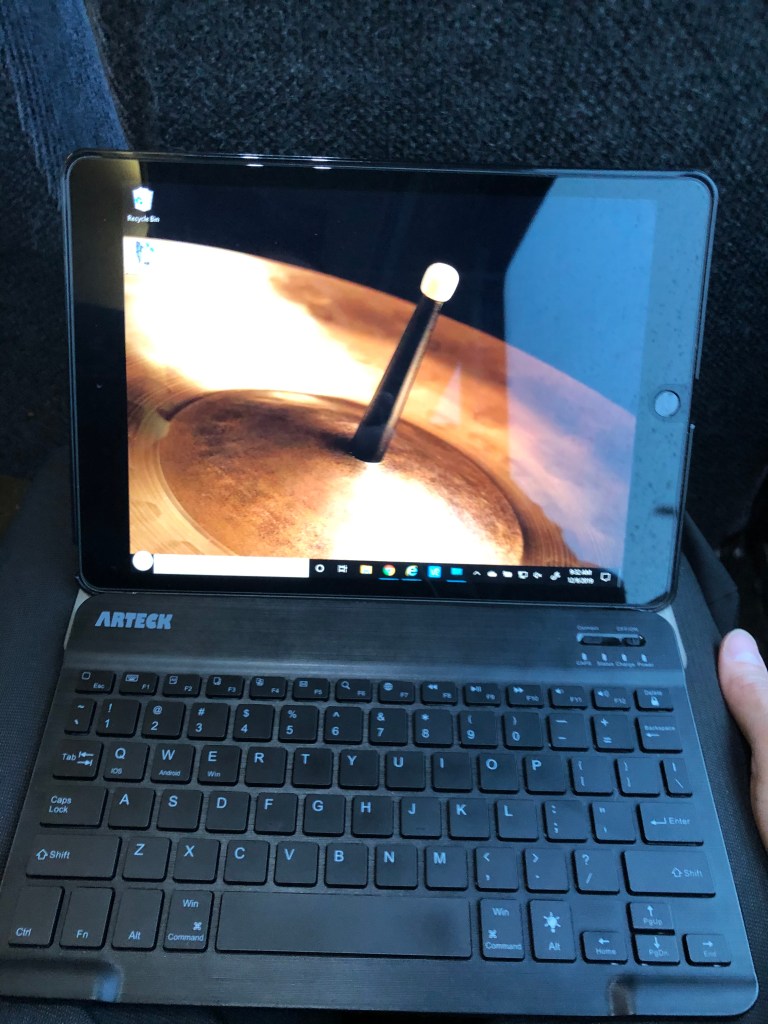
I still cannot understand why I bought this device. Most of the apps are just resized iPhone apps and the app developers didn’t even bother to allow rotation for them. You would think that after almost a decade of this type of device in the market that all apps would be designed with both iPhone and iPad in mind. Very basic apps like WhatsApp, Facebook and Instagram are just garbage on a larger screen iPad. It’s like no one is even trying to make better iPad versions of well known iPhone apps. I have to admit that the Safari and Chrome browsers do support full desktop implementations making most of the web sites work well but that’s not exactly why you buy an iPad. You might as well just buy a Chromebook for that. Or stop me if I sound crazy, maybe just use an actual laptop instead? So I give this iPad one last chance to be productive by spending another $100 for a proper keyboard. The official iPad keyboard was overpriced garbage being flimsy and all so I decided to go for a Brydge keyboard. I have to say that this is a much better experience as I always have it attached and accessible to the iPad, it is solid and heavy that it doesn’t tip over and it was perfectly lappable. I now have a smaller, less powerful, cannot run full desktop applications, $429 laptop. What a great adventure!

I now have a smaller, less powerful, cannot run full desktop applications, $429 laptop
Mad Computer Scientist
Total cost of Adventure
- 30 pin cable – $7.95
- Home button replacement kit – $6.89
- iPad 2 Screen Replacement kit – $17.59
- iPad 2019 128gb – $329
- iPad Smart Case – $11.99
- Brydge Keyboard – $100
- 8 hours of repair work
- 2 weeks of emotional regret
- A lifetime of hating Apple (more)

Well done Apple! however I’m interested in the music videos, are you the star? Where can I find them? 🙂
LikeLiked by 1 person
You can check them out here: http://oneboyrockband.com/. I am unfortunately (fortunately for everyone else) not the star. I do show up occasionally when my band mate lets me. There is a reason the band is called One Boy Rock Band. There can be only one!
I plan to setup a unique web site for it once I have the time. I haven’t found an embedded video player that can show/hide layers so I’m planning to build one. That way people can enjoy watching a video with one, two, three or all the boys in the rock band!
LikeLike